one really easy way for kids to feel super is by sporting a superhero cape. in fact, as i took pictures of espen and tilly in their capes {above}, it became apparent to me that there actually is a transformation that occurs when their capes are on. so i asked them if they could run super fast, stop a meteor from hitting the earth and leap over our house and espen answered, "of course! i'm a superhero!". i couldn't help but chuckle and chase them around, but later on i was able to talk to them {mostly espen} about the characteristics of a superhero {they use their abilities to help others} and encouraged him to do the same.
it was a very sweet teachable moment.
just wanted to share.
now back to the toot.
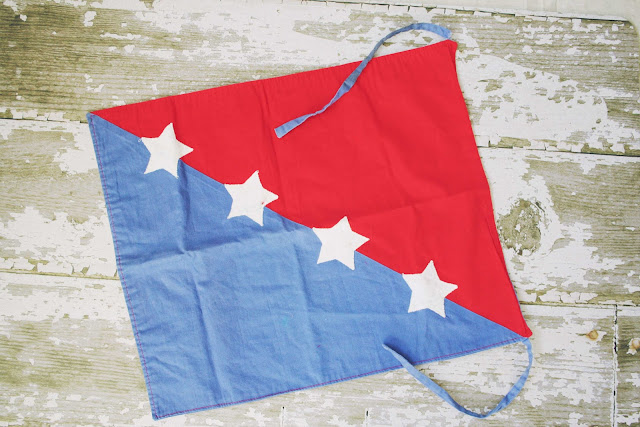
our inspiration comes from this vintage cape that was worn by my husband {yoder} when he was a child. not sure if it has existed long enough to truely be vintage but we'll go with it.
you will notice that there is not much shape to it, just straight lines so it's similar to the towels, pillow cases or baby blankets that may have doubled as capes in the past and it makes cutting and sewing very easy... my favorite feature!
the pictures in this tutorial are of matilda's white cape featured at the top of this post. the main part is cut from an old canvas ikea curtain so i didn't make it double sided. if you are using quilting weight fabric then you may want to sew together a front and back {like a pillow}. i'll note the difference throughout the tutorial.
no. 1 - pick out a variety of fabric and coordinating ribbon. one {or two, if you are making a double sided cape} piece needs to be large enough for the cape {16.5x19.5"}. the other's can be scraps big enough for whatever embellishment you decide on. for the ruffle, i used strips approximately 1.5 times the width of the cape which is enough for a loose ruffle.
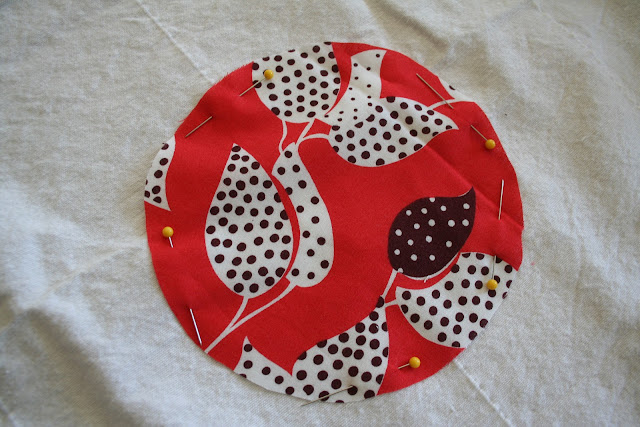
then pin the first layer of applique.
set your sewing machine to a zig zag stitch and sew around the border.
next, pin the second layer and stitch using a zig zag.
it was a very sweet teachable moment.
just wanted to share.
now back to the toot.
our inspiration comes from this vintage cape that was worn by my husband {yoder} when he was a child. not sure if it has existed long enough to truely be vintage but we'll go with it.
you will notice that there is not much shape to it, just straight lines so it's similar to the towels, pillow cases or baby blankets that may have doubled as capes in the past and it makes cutting and sewing very easy... my favorite feature!
the pictures in this tutorial are of matilda's white cape featured at the top of this post. the main part is cut from an old canvas ikea curtain so i didn't make it double sided. if you are using quilting weight fabric then you may want to sew together a front and back {like a pillow}. i'll note the difference throughout the tutorial.
no. 1 - pick out a variety of fabric and coordinating ribbon. one {or two, if you are making a double sided cape} piece needs to be large enough for the cape {16.5x19.5"}. the other's can be scraps big enough for whatever embellishment you decide on. for the ruffle, i used strips approximately 1.5 times the width of the cape which is enough for a loose ruffle.
no. 2 - cut your cape fabric{s} 16.5" wide and 19.5" long.
then think about how you want to embellish it.
no. 3 - if you are appliqueing a design, cut the design from a piece of paper. click here to use our lighting bolt and here if you would like to use our 6" circle.
then trace it onto your desired fabric using a pencil or fabric marker and cut.
no 4 - {if you are making a ruffle as pictured above} cut a snip in your fabric 2.5"wide
then tear the entire length of the fabric. repeat depending on the number of ruffles you want.
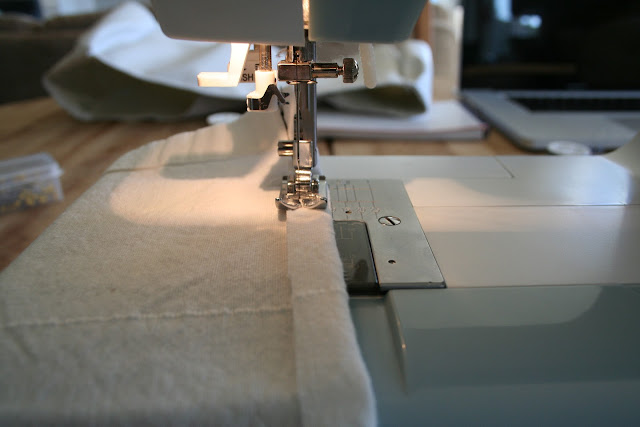
no. 5 - change the settings on your sewing machine to make a ruffle {the first number on the left of my machine, pictured, is a 9}.
sew along one side of your strip of fabric. repeat.
no. 6 - now that you have all the elements of the cape cut out and ready, reset your sewing machine, fold a quarter inch hem {pinning or ironing in place if you prefer} on all sides and sew the sides and bottom. if you are making a double sided cape, skip this step and step no. 7.
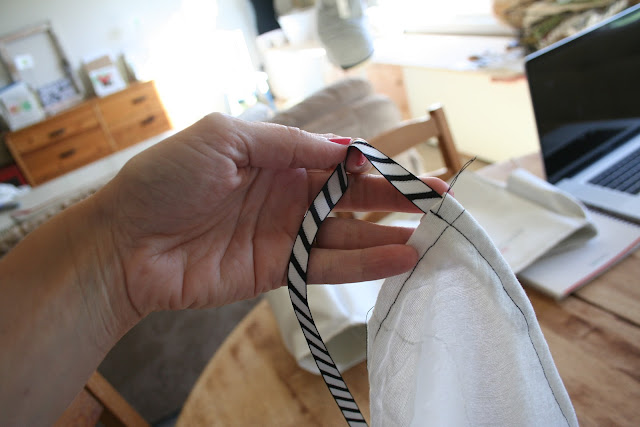
no. 7 - next cut two pieces of ribbon long enough to tie around your child. place the ribbon inside the prepared top hem and pin into place. then sew the top hem, backstitching on both sides.
so it's secure.
no. 8 - next pin the first layer of ruffle into place. sew a straight stitch along the existing stitch. repeat.
then pin the first layer of applique.
set your sewing machine to a zig zag stitch and sew around the border.
next, pin the second layer and stitch using a zig zag.
no. 9 - if you are making a double sided cape, place front and back fabrics right sides together and sew ½ inch seam around leaving a 6 inch opening. trim extra fabric from corners and turn right side out using a pencil or knitting needle to square corners. cut two 18 inch pieces of ribbon and attach at top corners.
no. 10 - lastly, give the cape to your little superhero and have fun taking some pictures!
it's a bird! it's a plane! it's.... little heros in really cute capes!
come back tomorrow for some super dinner recipes.
xo


love love love, especially the girl cape. is it weird that a super hero cape makes me want a girl?
ReplyDeleteWow Rae..... How big can you make these??
ReplyDeleteLove, Dad
dad, i would be happy to make a cape your size, but only if you let me take pictures of you in i! haha!!! that would be fun. xo
ReplyDeletewhipped up a cape yesterday when I got home from subbing. My 7th grader was going to the last home football game last night and wanted to be a "Super Fan" She had missed all the other games because of volleyball. Anyhoo she wanted it to be zebra fabric. Our colors are black and red so I cut out the cape in zebra then sewed red/white polka dot ribbon on bottom and then used some for the ties on top. I then cut out a big C and J for our team in red and appliqued it on there. She got so many compliments and people were asking her to turn around so they could snap a picture. Thanks for the idea!
ReplyDelete