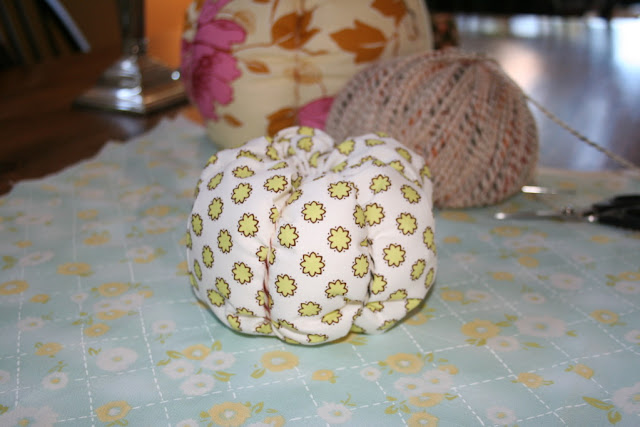
These pumpkins were easy to make and don’t require a sewing machine
(though having one will make quicker work of it!)
I think we need to mention that we think these (or something very much like them) came from a Martha Stewart article, but a search of her website didn’t turn up any stuffed fabric pumpkins. And I made several of these when the kids were young, not exactly like these, but pretty close, so they have been around a long time.
Here is what you need:
- fabric – use your scraps if you have them. don’t be shy about trying that fabric you just hate.
- scissor or a rotary cutter – whichever you like to use. if you use a rotary cutter you will need a self healing mat.
- ruler
- fabric marker
- embroidery floss and embroidery needle
- polyester fiber fill
- yarn and yarn needle
- sewing machine (optional)
Cut your fabric into a rectangle twice as long as it is wide. The rectangle for my smallest pumpkin measured 7 inches by 14 inches. I liked starting with small size because I didn’t want to ‘learn’ on a large piece of fabric and have it be wasted.
Fold the fabric in half right sides together to make a (nearly) square. You may want to mark a ½ inch seam line a regular or fabric pencil. If you are secure in ability to keep your stitches straight, you may skip this step.
Thread an embroidery needle with two stands (embroidery thread comes with 6 strands that you need to separate), knot the end and sew along the seam line using a back stitch. You may use a machine for this step if you wish.
Using 2 strands of embroider thread, knot the end and sew along one open side of the fabric using a running stitch and a ½ inch seam.
Pull the end to gather fabric tight and secure by tying off the thread.
Flip your square right side out and stuff with poly fill. Fill it really full. So that the fill is poofing out of the top.
Now thread you needle again with embroidery thread and do a running stitch around the open edge using another ½ inch seam and pull tight (while you stuff the fill in) to close. Now you have a cute stuffed bag.
Now you are going to turn that bag into a pumpkin. You can use embroidery thread for this step, but my experience was that yarn and a yarn needle made it soooo much easier especially as the pumpkins got bigger.
Thread your need and knot the end. Make sure you have a long enough piece of yarn to go several times around your pumpkin.
Flip your pumpkin over and stick your needle in the center. Work in all the way through (you will have to scrunch your pumpkin) and pull the needle out the center of the top. Pull you needle and yarn around the pumpkin and back up through the center bottom.
Do this enough times to make you bag look like a pumpkin. You will want to pull it tight so get good pumpkin ‘ridges’. Tie off your yarn and make sure it is secure.
Now to make the stem:
Draw a stem outline freehand on the wrong side of your fabric and cut it out. place it on another piece of fabric and trace and cut out (or you may cut through two pieces of fabric at a time if you stack the fabric) - the size will depend on how large your pumpkin is.
Place both stem pieces right sides together and stitch around using a back stitch using a small seam allowance. Leave the bottom open.
Turn your stem right side out and stuff with fill. Stitch closed.
Attach to the top center of your pumpkin hiding your stitches as best you can. On one of my larger pumpkins, I put a small burlap circle under the stem just for decoration. I am not sure it adds much, but I encourage you to personalize your pumpkins by using your never ending imagination.
{the munchkins had fun playing}
{are your kids crazy for "silly bracelets?}
Yay. Super Cute Pumpkin is a done deal.
jane . president + gamma . armommy


No comments:
Post a Comment